ThinQ
CPaaS allows you to easily integrate with your existing providers via SIP as a Bring Your Own Carrier (BYOC).
thinQ is a voice API platform that can be integrated with CPaaS as BYOC. Follow the steps below to have inbound calls from thinQ routed to CPaaS as well as outbound calls from CPaaS routed to thinQ.
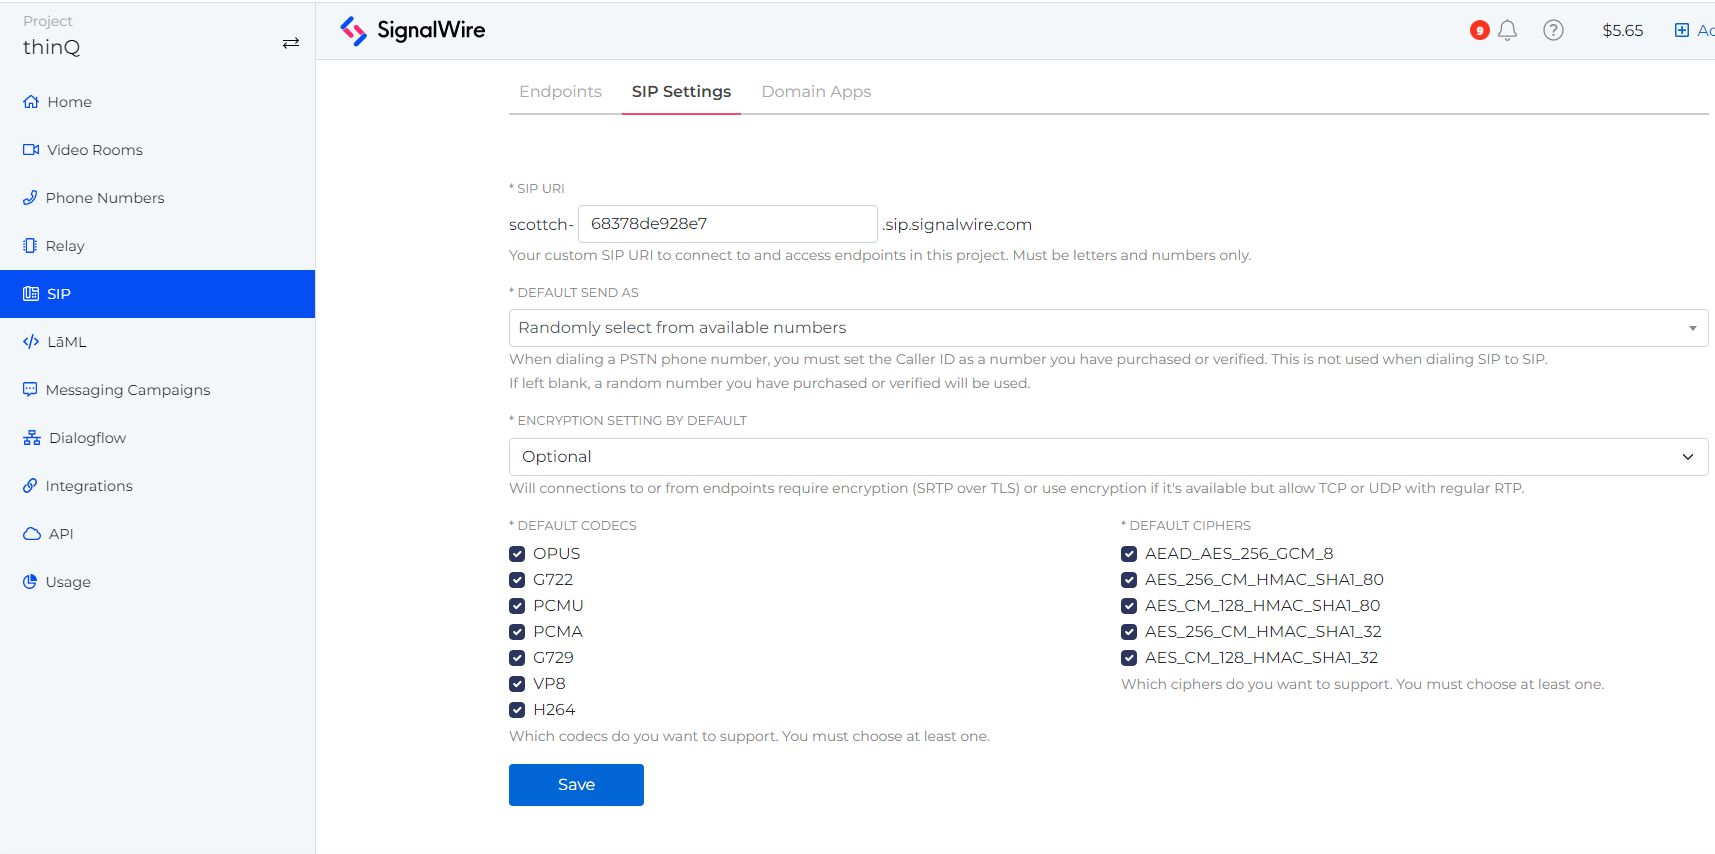
Check CPaaS SIP settings
The first step is to check the SIP settings in your CPaaS Space.
Go to SIP > SIP Settings. Leave the default settings as is.
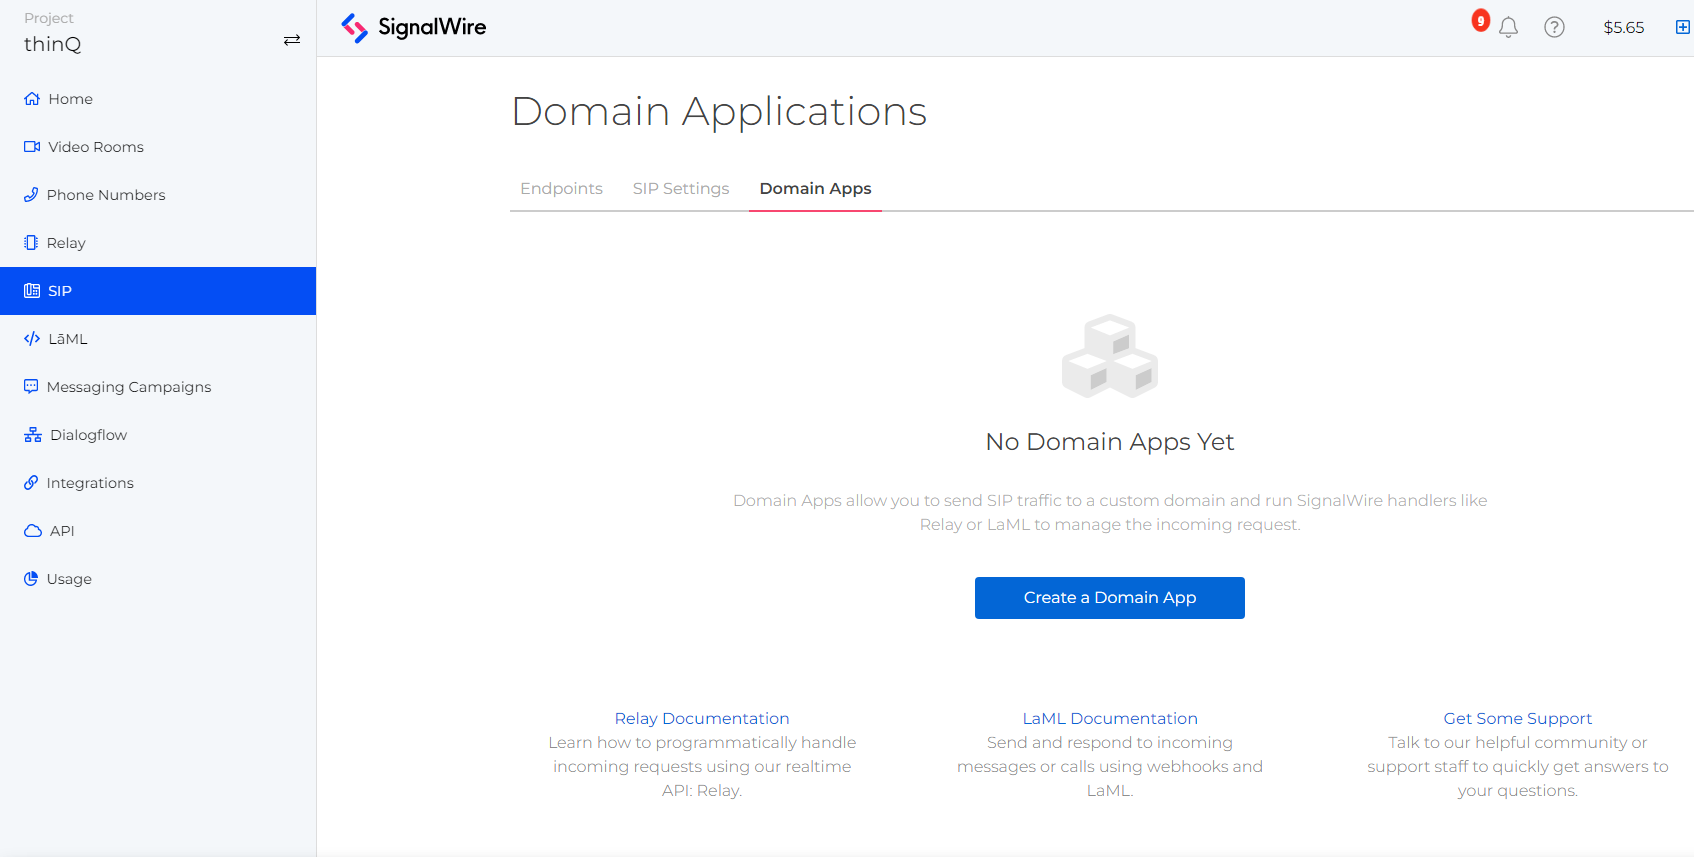
Create a SIP Domain Application
Go to SIP > Domain Apps > Create a Domain App
Name the Domain App thinQBYOC and input BYOC for the APP URL.
Click Save.
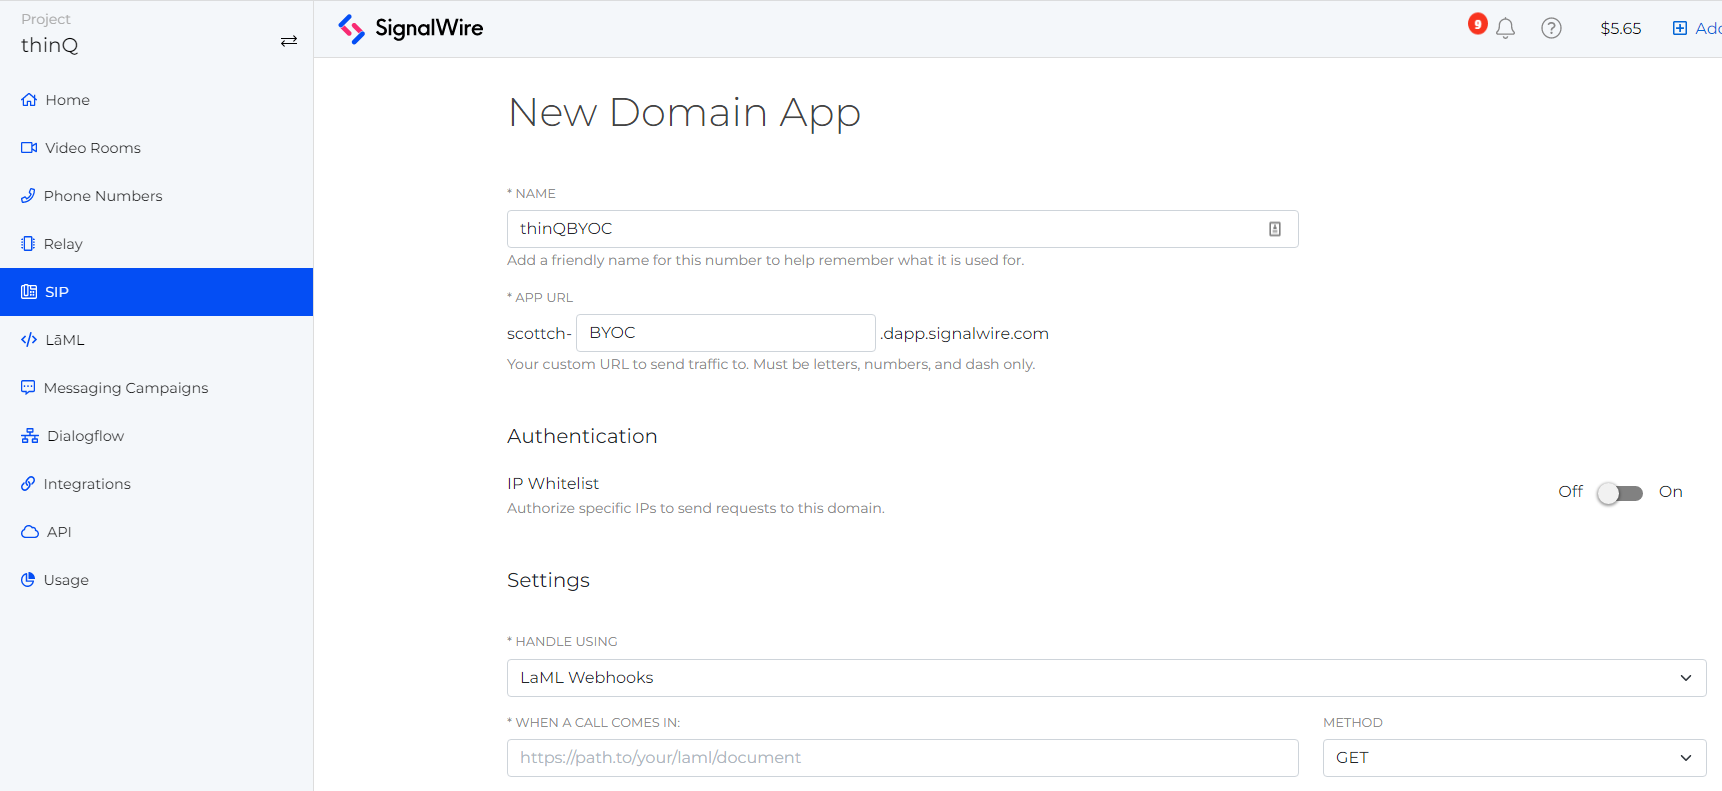
Copy the URL generated for the Domain App as you’ll need it during your inbound routing profile setup inside thinQ.
Create an Inbound Routing Profile at thinQ
Go to thinQ.io > Inbound > Routing Profiles > Inbound Profiles
Click on a new profile, and use CPaaS-YourCompanyName or just CPaaS as the name.
Select DNS A for Type and enter the full CPaaS Domain App URL for Address.
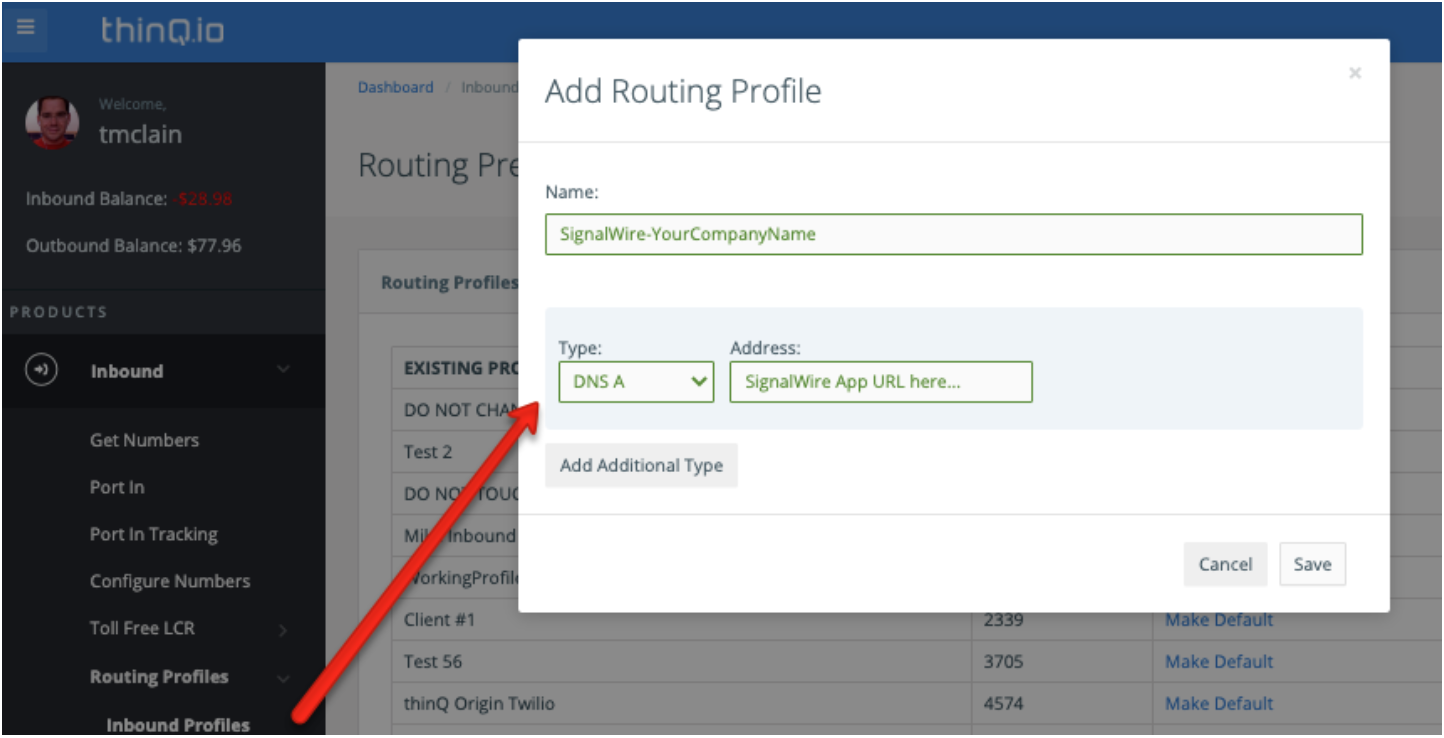
You may want to create multiple SIP Domains on CPaaS for different applications, which would allow you to create additional routing profiles. Be sure your naming system is descriptive so you recognize what it matches within CPaaS.
Configuring CPaaS for thinQ Outbound Call Routing
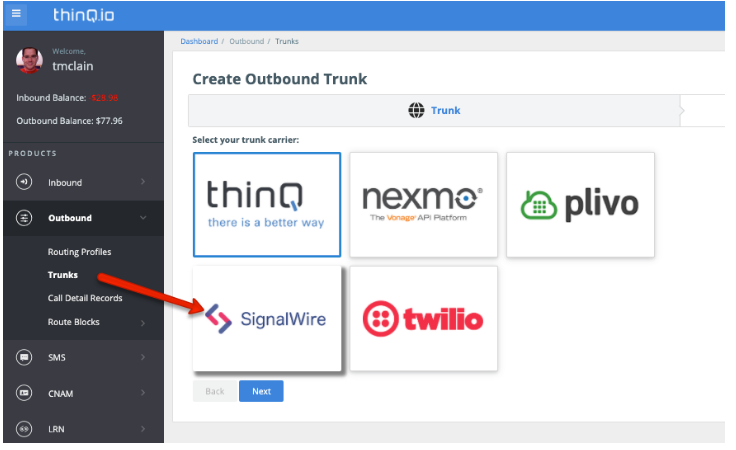
Go to thinq.io > Outbound > Trunks > Add New.
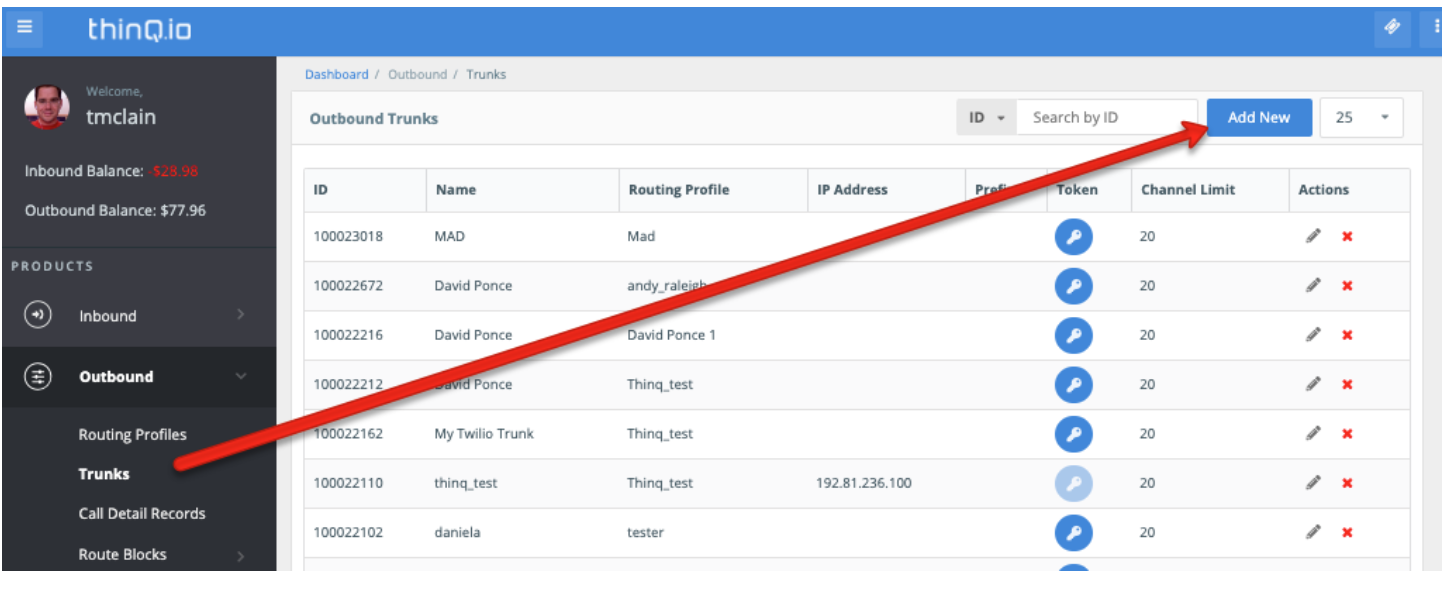
Give the trunk a name and then choose the thinQ Profile that you want to associate the trunk with from the Select Trunk Type drop-down and select Connect.
For Select your trunk carrier, click CPaaS and then click Save.
Navigate to thinq.io > Outbound > Trunks and click on the Token icon to the right of your newly created CPaaS Trunk. This token and your thinQ Account ID will be needed to configure the SIP URI in CPaaS. This is required for routing outbound calls from CPaaS through thinQ.

Making Outbound Calls via the cXML API
Take a look a a full example using Ruby:
require ‘signalwire/sdk’
client = Signalwire::REST::Client.new ‘your-project’, ‘your-token’, signalwire_space_url: “example.signalwire.com”

call = client.calls.create(
url: ‘http://YOURSPACE.signalwire.com/YOUR-LAML-BIN-ID’,
to: ‘sip:12155551212@wap.thinq.com?X-account-id=0123&X-account-token=4567890;transport=udp?header1=foo&header2=bar’,
from: ‘+15559988777’,
sip_auth_username: ‘user’,
sip_auth_password: ‘pass’
)
curl https://<YOURSPACE>.signalwire.com/api/laml/2010-04-01/Accounts/<YOURACCOUNTSID>/Calls.json \
  -X POST \
  --data-urlencode "Url=http://your-application.com/docs/voice.xml" \
  --data-urlencode "sip:12155551212@wap.thinq.com?X-account-id=0123&X-account-token=4567890;transport=udp?header1=foo&header2=bar" \
  --data-urlencode "From=+15550011222" \
  --data-urlencode "SipAuthUsername=user" \
  --data-urlencode "SipAuthPassword=pass" \
  -u "YourProjectID:YourAuthToken"